Tilez
![]()

 tilez
tilez
tilez is a generic layout engine for Svelte components.
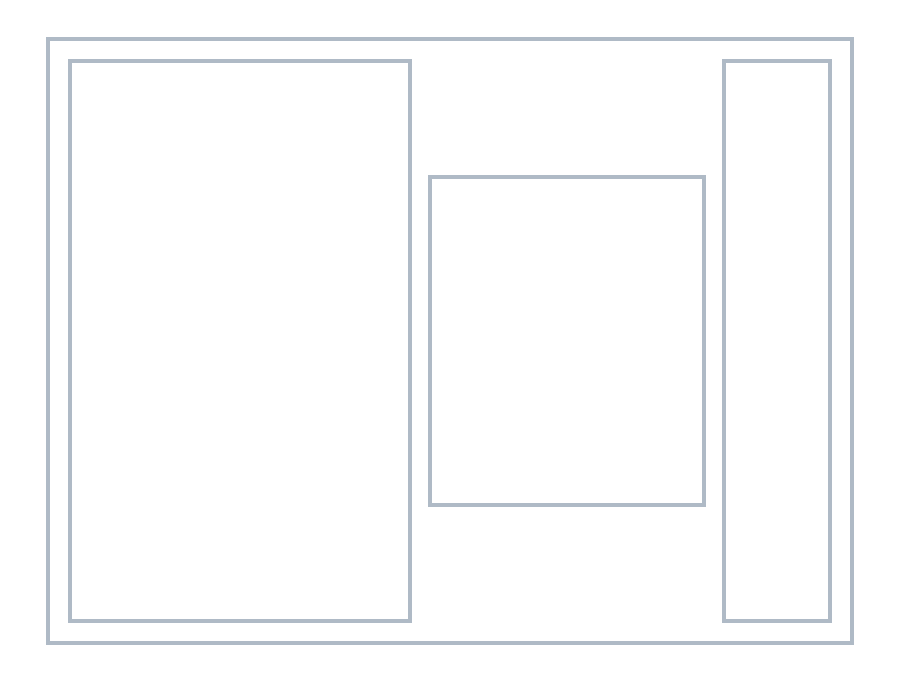
Above layout was generated by tilez, where root tile props (width, height and padding) are changing over time. Boxes shown are a mixture of HTML, SVG, Canvas and WebGL elements.
By default, all tiles – the building blocks of a layout – are renderless components. A layout is defined via nested, stackable tiles, where each tile has its own coordinate space, which is accessible through Svelte stores within a tile's context.
tilez is
- easy-to-use – declare your layout in a simple manner
- flexible – can be used with SVG, HTML, Canvas, WebGL or renderless components
- reactive – changing props of a tile will update all subtiles
- free of dependencies – except for Svelte
- opinionated – the way the layout algorithm works (see here)
- robust – handles edge cases very well
- light-weight – does not add more than a few bytes to your Svelte application
The main application of tilez is to use it as abstraction layer for creating compositions and layers of arbitrary SVG charts for data visualization. As SVG is lacking a layout engine, tilez fills that gap. However, it can be used with HTML, Canvas and WebGL, too.
Here is an example of a composition of several different Observable Plot charts, which makes up an UpSet plot. Individual charts are embedded in a simple tilez layout. The final result is one single SVG chart (w/o HTML).

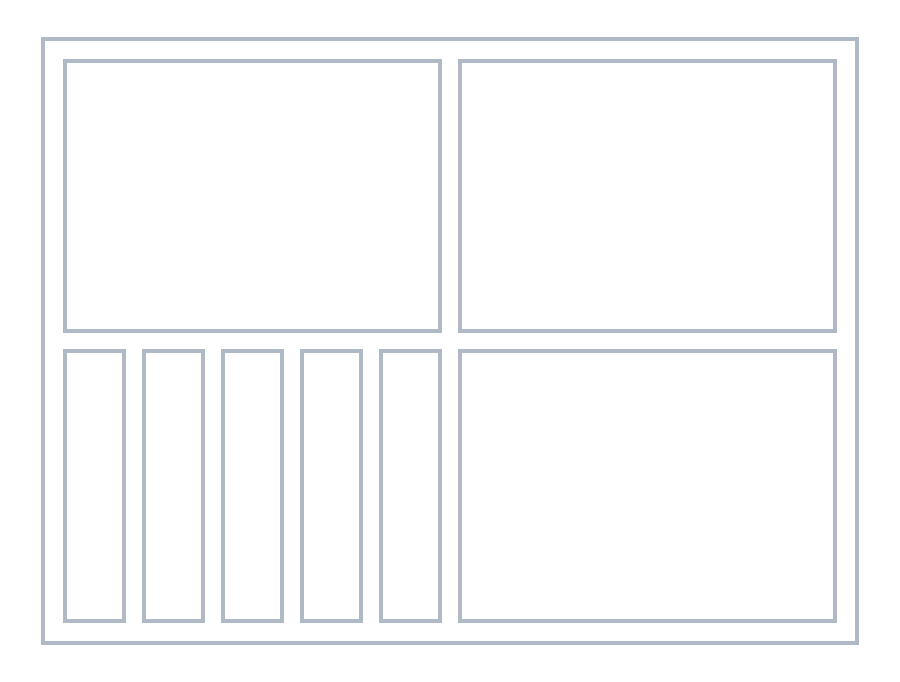
tilez is also helpful for building dashboards. It can easily create open, table, stratified and grouped layouts (see also Dashboard Design Patterns). With tilez, pure SVG dashboards can be implemented effortlessly.

Above dashboard in open layout contains charts using Apache ECharts library.
Look at accompanying packages
for using chart libraries with tilez.
Table of contents
- Installation
- How to specify layouts?
- How to access tile information?
- How does the layout algorithm work?
- API Reference
Installation
Install tilez as npm package via
npm install tilez
How to specify layouts?
A Tile component is a building block of a layout.
Import Tile Component
A Tile component can be imported by
import { Tile } from 'tilez';
Tile Component Props
A Tile component has following available props (see API Tile Props for details)
<Tile
  stack="horizontal"
  width="800px"
  height="600px"
  innerPadding="10px"
  outerPadding="5px"
  hAlign="left"
  vAlign="top"
  type="plain"
  mode="spacing"
>
  ...
</Tile>
All props are optional, i.e. you can have tiles with no props at all
<Tile>
  ...
</Tile>
Tile props are reactive (except for stack and type), i.e. if you change props for an arbitrary tile in tile hierarchy, whole subtree of tiles is rerendered according to updated props.
If you want to know exactly what happens, when you alter these props in a given layout – without reading through API Tile Props – take a look at tilez.spren9er.de and play around with an interactive example layout.
Stacking Tiles
The main concept of tilez is stacking tiles in horizontal or vertical direction, recursively. Within a stack, a tile starts at the point where the last tile ends. For stacking, you use the property stack, which defines in which direction children tiles should be stacked.
For convenience, there are following shortcuts available
- HTile for horizontal stacking
- VTile for vertical stacking
These components have the same props available as a basic Tile component (except for stack property).
Layering Tiles
Assuming no stack is given for a tile, then all children tiles will be layered. They share the same coordinate space like their parent tile. Also, they are rendered in the specified order. Thus, first tile will be displayed in the back, last tile in the front.
Tile Layouts
Layouts can be described in a declarative way, by defining props of nested tiles. Here is an example of a simple layout
<HTile width="400px" height="300px" innerPadding="10px" outerPadding="5px">
  <Tile width="180px">
    <MyComponent1 />
  </Tile>

  <Tile height="60%" vAlign="center">
    <MyComponent2 />
  </Tile>

  <Tile width="30%">
    <MyComponent3 />
  </Tile>
</HTile>
Check out a similar example in Svelte REPL!
How to access tile information?
After defining a layout, arbitrary Svelte components can be embedded in your tiles. In your components you get access to tile specs, linear scales of local coordinate system and a reference to HTML/SVG/Canvas/WebGL element by adding the following lines
import { getTileContext } from 'tilez';

const {specs, xScale, yScale, element } = getTileContext();
All objects – which you obtain from a tile's context – are Svelte stores. See API Tile Context for details.
Alternatively, you can use getContext from Svelte
import { getContext } from 'svelte';

const {specs, xScale, yScale, element } = getContext('tilez');
For Canvas or WebGL elements you can retrieve additionally CanvasRenderingContext2D or WebGLRenderingContext, respectively as Svelte store context from getTileContext.
Tile Specs from Tile Context
Tile specs give you information about width and height of tile, as well as relative positions w.r.t. root, subroot and parent tile.
For further specs information see API Tile Specs.
Linear Scales from Tile Context
For each tile, there are two linear scales $xScale and $yScale available, one for x-axis and one for y-axis.
Their domain is [0, 1] and their range is [0, $specs.width] or [0, $specs.height], respectively.
You can modify the domain for each scale.
import { getTileContext } from 'tilez';

const { xScale, yScale } = getTileContext();

const x = $xScale.domain([-5, 5]);
const y = $yScale.domain([0, 400]);

const sampleCoords = [x(0.5), y(150)];
Note: If you need non-linear scales, consider using d3-scale with given tile specs.
See also API Linear Scale.
Access HTML, SVG or Canvas element
There are following ways to get a reference to the underlying HTML, SVG, Canvas or WebGL element of a tile.
Get Element from Tile Context
Within your component – which is embedded in a Tile component – you can get access to an element store by using getTileContext.
import { getTileContext } from 'tilez';

const { element } = getTileContext();

$effect(() => {
  doSomethingWith($element);
});
Bind Element from Tile
Elements can also be accessed from outside of tile scope using bind
<script lang="ts">
import { Tile } from 'tilez';

let element: SVGElement;

$effect(() => {
  doSomethingWith(element);
});
</script>

<Tile type="svg" bind:element>
  ...
<Tile>
Get Canvas or WebGL Context from Tile
For Canvas and WebGL elements, you retrieve context for drawing from getTileContext. Here is an example of using Canvas in your component
const { specs, context } = getTileContext();

$effect.pre(() => {
  if ($context) {
    const ctx = $context as CanvasRenderingContext2D;
    const dpr = window.devicePixelRatio || 1;
    const thickness = 1 * dpr;

    const offset = thickness / 2;
    const width = $specs.width * dpr - thickness;
    const height = $specs.height * dpr - thickness;

    ctx.beginPath();
    ctx.strokeStyle = '#cccccc';
    ctx.lineWidth = thickness;
    ctx.rect(offset, offset, width, height);
    ctx.stroke();
    ctx.closePath();
  }
});
Note: When using Canvas tiles, make sure that you multiply specs coordinates with window.devicePixelRatio.
Tile Specs from Tile Component
Tile specs can also be accessed directly via children snippet
<HTile width="400px" height="300px" innerPadding="10px" outerPadding="5px">
  <Tile width="180px">
    {#snippet children({ specs: { width, height } = {} })}
      <MyComponent1 {width} {height} />
    {/snippet}
  </Tile>

  <Tile>
    ...
  </Tile>
</HTile>
or from outside of tile scope using bind
<script lang="ts">
import { Tile, type TileSpecs } from 'tilez';

let specs: TileSpecs | undefined;

$effect(() => {
  doSomethingWith(specs);
});
</script>

<Tile type="svg" bind:specs>
  ...
<Tile>
How does the layout algorithm work?
The underlying layout algorithm should behave well in all circumstances, especially when there is not enough space to render all given tiles.
But which tiles should be rendered and which should be ignored?
In the following, we take a closer look at an opinionated rendering algorithm, which is implemented in tilez. We consider the algorithm for a single tile with a non-trivial stack direction ('horizontal' or 'vertical') and its direct children tiles. This algorithm then can be applied to each stack of the tiles hierarchy.
Tiles Prioritization
Before tiles are rendered within a stack, they are sorted according to following order
- Tiles of absolute sizes
- Tiles of relative sizes
- Tiles of flex sizes (no size specification)
Within each group, tiles are sorted according to the natural order given (ascending order of children tiles within parent tile). The order gives information about the priority for rendering. First tiles of above order have high priority and will be rendered first, while last tiles have low priority and won't be rendered at all, if there is not enough space left.
Note: Alignment props are not taken into consideration when sorting! Thus, tile B which comes after tile A in natural order and belongs to same group, could be aligned as such that it appears before tile A. This fact can be used to take influence in the rendering behavior.
Layout Algorithm
- We take one tile after the other of first sorted group above (tiles of absolute sizes) and for each tile we determine its size, as long as enough space is available. A tile which doesn't fit completely in available space is cut off. Then, rest of tiles will have zero size.
- For determining other tiles sizes, we have to look at each specific layout mode separately (see API Layout Mode)
- Spacing Mode: If sizes of all tiles of first group are determined and there is still space left, the available space will be distributed between all remaining tiles in the following way
- Filter out tiles of relative size which can't be rendered, because their calculated size is less than 1px.
- For all remaining tiles of second group (tiles of relative sizes), we will process tiles like in first step: Resulting sizes will be determined one by one. If there is not enough space available, tile will be cut off and all remaining tiles will have zero size.
- If sizes of all tiles of relative sizes are determined and there is still space left, we consider the last group of tiles (flex tiles w/o size specification). Assuming there are n flex tiles left. Their size will be calculated by distributing remaining space equally across flex tiles (each flex tile will have same size). If sizes are less than 1px, we try to distribute remaining space across n - 1 flex tiles, then n - 2 flex tiles, and so on. Finally, we either have some flex tiles with large enough sizes to render or all flex tiles will have zero size.
- Sizing Mode: Let m be the number of tiles with relative and flex sizes. We want to distribute k <= m tiles (with k max.) and start with k = m.
- We try to determine k tiles with non-zero relative and flex sizes.
- We subtract (k - 1) x inner padding from available space.
- For remaining space we apply above steps of 'spacing' mode. Assuming p tiles of relative size have non-zero size, then in last step we only check if n = k - p flex tiles can be rendered or not.
- If previous step is not successful (there aren't k tiles in total which have non-zero size), then we decrement k and repeat steps above. Algorithm stops at the latest when k = 0 and all tiles have zero size.
- Spacing Mode: If sizes of all tiles of first group are determined and there is still space left, the available space will be distributed between all remaining tiles in the following way
So far, we only computed the resulting size for each tile. Now, we consider the rendering algorithm. When all sizes are determined with the process above, tiles are grouped according to their alignment w.r.t. stack direction ('hAlign' for 'horizontal' and 'vAlign' for 'vertical'). This will generate three groups. We process them in the following way
- Render all tiles of 'left' or 'top' group according to their natural order from left to right or top to bottom.
- Render all tiles of 'right' or 'bottom' group according to their natural order (here descending) from right to left or bottom to top.
- Render all tiles of 'center' group according to their natural order in the middle of parent tile. If there is an overlap with tiles from first or last group, we shift the center group to the right or left (this group then won't appear in the center).
In each step above, zero-sized tiles are ignored.
API Reference
Tile Props
# tilez.Tile.stack · ('horizontal' | 'vertical') [default: undefined]
When this property is not given, all children tiles will have the same coordinate space like current tile and they are layered in the natural order given. Otherwise, children tiles will be distributed within current tile according to their props in 'horizontal' or 'vertical' direction.
# tilez.Tile.width
Argument can be an absolute or relative number. Accepts strings like "500px", "500", "50%", "0.5" or numbers like 500 or 0.5. Numbers between 0 and 1 are interpreted as percentages, otherwise they represent absolute widths. The given width will result in different tile widths, depending on the layout mode. Relative widths refer to the width you obtain when you subtract all absolute tile widths from full width. When there is no width given (default), remaining width in parent tile – after rendering tiles with absolute and relative width – will be distributed equally between current tile and other tiles having no width specification. For root tile relative widths are not allowed. When no width is given in root tile, parent container needs to have explicit width specified, otherwise nothing is rendered.
# tilez.Tile.height
Analog to width above.
# tilez.Tile.innerPadding · [default: 0] [inherits]
Defines the padding between children tiles of current tile. Format must be either a string like "10px", "10" or a number like 10. Relative values are not supported. For layout mode 'spacing' it adds half of the given inner padding to the left and right of the outer tiles (or tile if there is only one). This property will be inherited, thus all children tiles will have the same inner padding for their children unless not specified explicitly in children tile. In other words, if inner padding of children tile is given, this value will be considered instead of inner padding of parent tile.
# tilez.Tile.outerPadding · [default: 0]
Defines the padding around children tile(s) of current tile. It is similar to CSS padding of a HTML container. This property won't be inherited.
# tilez.Tile.hAlign · ('left' | 'center' | 'right') [default: 'left']
Defines the horizontal alignment w.r.t. parent tile. Accepts 'left', 'center' and 'right'. When several children tiles share the same alignment property, they will be positioned as a group according to their given order within parent tile. For 'center' applies: If centered group can't be positioned in the center because there will be an overlap with 'left' or 'right' groups, it will be shifted to the right or left, respectively.
# tilez.Tile.vAlign · ('top' | 'center' | 'bottom') [default: 'top']
Defines the vertical alignment w.r.t. parent tile. Accepts 'top', 'center' and 'bottom'. It behaves like hAlign, but in vertical direction.
# tilez.Tile.type · ('plain' | 'svg' | 'html' | 'canvas' | 'webgl') [default: 'plain'] [inherits]
This property sets the document type of current tile. Available types are 'plain', 'svg', 'html', 'canvas' and 'webgl'. Type inherits from parent tile unless not specified explicitly. Otherwise, given type will be taken into consideration.
Plain Tile (Renderless Component)
By default, using tilez won't create any containers, i.e. all components are renderless components (type is 'plain').
SVG Tile
Using type 'svg', (sub)root tile will be an SVG container <svg> and all children tiles will be rendered as SVG group <g>.
HTML Tile
For 'html' tiles, all <div> containers are implicitly absolute positioned. If you want to have a pure HTML layout, you should probably consider using CSS flexbox and CSS grid, as they are more powerful and flexible.
Canvas Tile
If you use 'canvas' tiles, (sub)root tile creates a <canvas> container. Within this container coordinate system is translated to each tile's origin. All children tiles will share the same <canvas> element.
WebGL Tile
If you use 'webgl' tiles, (sub)root tile creates a <canvas> container. All children tiles will share the same <canvas> element and also the same coordinate system, even they are placed in a stack.
Mixing Tile Types
You can mix tile types, e.g. start with an HTML tile and add various subroot SVG, Canvas and/or WebGL tiles. Plain tiles can be added at each level in the tile hierarchy. However, there are following restrictions:
- An 'html' tile can't be embedded into an 'svg', 'canvas' or 'webgl' tile.
- An 'svg' tile can't be embedded into a 'canvas' or 'webgl' tile and vice versa.
- A 'canvas' tile can't be embedded into a 'webgl' tile and vice versa.
# tilez.Tile.mode · ('spacing' | 'sizing' ) [default: 'spacing'] [inherits]
There are two layout modes available: one which is optimized for 'spacing' and one for 'sizing'. They differ on how to interpret sizes when you specify a non-zero inner padding. When no inner padding is given, both modes produce the same layout.
Tile Layout Mode Spacing
In layout mode 'spacing' (default mode), inner padding is part of the size specification of a tile. For a given width of 100px and an inner padding of 20px, the resulting width of the tile is 80px. On each side of a tile, there is an empty space of 50% of inner padding, in our example 10px. The consequence is that in this layout spacings are aligned properly across stacks, e.g. the first gap of a tile with 50% width is aligned with the fifth gap of five stacked tiles with 10% width each.
Note: There will be empty space of 50% inner padding on all sides of the most outer tile. If you want equidistant paddings throughout the whole tile hierarchy, you can add an outer padding in root tile of inner padding / 2.
When you use absolute sizes together with relative sizes to define your layout, make sure to add outer padding to your size beforehand. As an example: You want to work with a width of 200px and outer padding is given as 10px. Then a tile of width 100px corresponds to a tile of 50% only when the initial width is defined as 220px, not 200px.
Tile Layout Mode Sizing
When layout mode 'sizing' is used, all tiles have exactly the size which is specified in tile props, i.e. for a given width of 100px, the tile has exactly a width of 100px (when there is enough space to render). Also, a tile of width 50% has 5 times the width of a tile of width 10% (if they are in the same stack!), which generally does not apply to 'spacing' layout mode.

It depends on your use case, which mode you choose. You can also mix modes, start with one mode and change to the other mode in an inner tile.
# tilez.Tile.specs
A reference to tile specs.
# tilez.Tile.element
A reference to an HTML, SVG or Canvas element (depending on the type). For renderless components ('plain' type), element is undefined. See also this section.
# tilez.Tile.wrapper
A reference to the wrapper element (HTMLDivElement) containing all tiles. This can be used to add styles via
<script lang="ts">
import { onMount } from 'svelte';
import { Tile } from 'tilez';

let wrapper: HTMLDivElement;

onMount(() => {
  if (wrapper) wrapper.style.border = '2px solid red';
});
</script>

<Tile bind:wrapper>
  ...
<Tile>
Only applicable for root tile.
Tile Context
# tilez.getTileContext()
Returns an object containing following Svelte stores
- specs of class Writable<TileSpecs>
- xScale of class Writable<LinearScale>
- yScale of class Writable<LinearScale>
- element of class Writable<HTMLElement | SVGElement | HTMLCanvasElement | null>
- context of class Writable<CanvasRenderingContext2D | WebGLRenderingContext | null>
Tile Specs
# tilez.TileSpecs.width
Width of tile
# tilez.TileSpecs.height
Height of tile
# tilez.TileSpecs.rootX
The x-coordinate w.r.t. root tile
# tilez.TileSpecs.rootY
The y-coordinate w.r.t. root tile
# tilez.TileSpecs.subRootX
The x-coordinate w.r.t. subroot tile. When type of tile changes when going from parent to child tile, there will be a new subtree in tiles hierarchy. The root tile of this subtree is called a subroot tile. The x value is the distance between the left position of subroot tile and the left position of given tile in horizontal direction.
# tilez.TileSpecs.subRootY
The y-coordinate w.r.t. subroot tile. See subRootX for definition of a subroot.
# tilez.TileSpecs.parentX
The x-coordinate w.r.t. parent tile
# tilez.TileSpecs.parentY
The y-coordinate w.r.t. parent tile
# tilez.TileSpecs.innerPadding
Padding between children tiles
# tilez.TileSpecs.outerPadding
Padding around children tiles
# tilez.TileSpecs.hAlign · ('left' | 'center' | 'right')
Horizontal alignment w.r.t. parent tile
# tilez.TileSpecs.vAlign · ('top' | 'center' | 'bottom')
Vertical alignment w.r.t. parent tile
# tilez.TileSpecs.aspectRatio
Aspect ratio (width / height) of tile
Linear Scale
# tilez.LinearScale.domain(domain: [number, number]) · [default: [0, 1]]
You can set a domain which will be mapped to the tile range. Domains are also supported, where upper bound is less than lower bound, e.g. for $xScale or $yScale using [1, 0] will map 0 to full width or height and 1 to 0.
# tilez.LinearScale.range(range: [number, number])
Even though $xScale and $yScale from a tile's context are coming with predefined ranges, such that they span the full width or height of a tile, you can override the range with this method.
# tilez.LinearScale.(x: number)
The class itself is directly callable. It computes the function value for a given x value.
# tilez.LinearScale.inv(y: number)
Method inv computes the x value for a given y value w.r.t. the inverse function. This can be useful for working with coords of mouse position.
