svelte course - Udemy
Intro
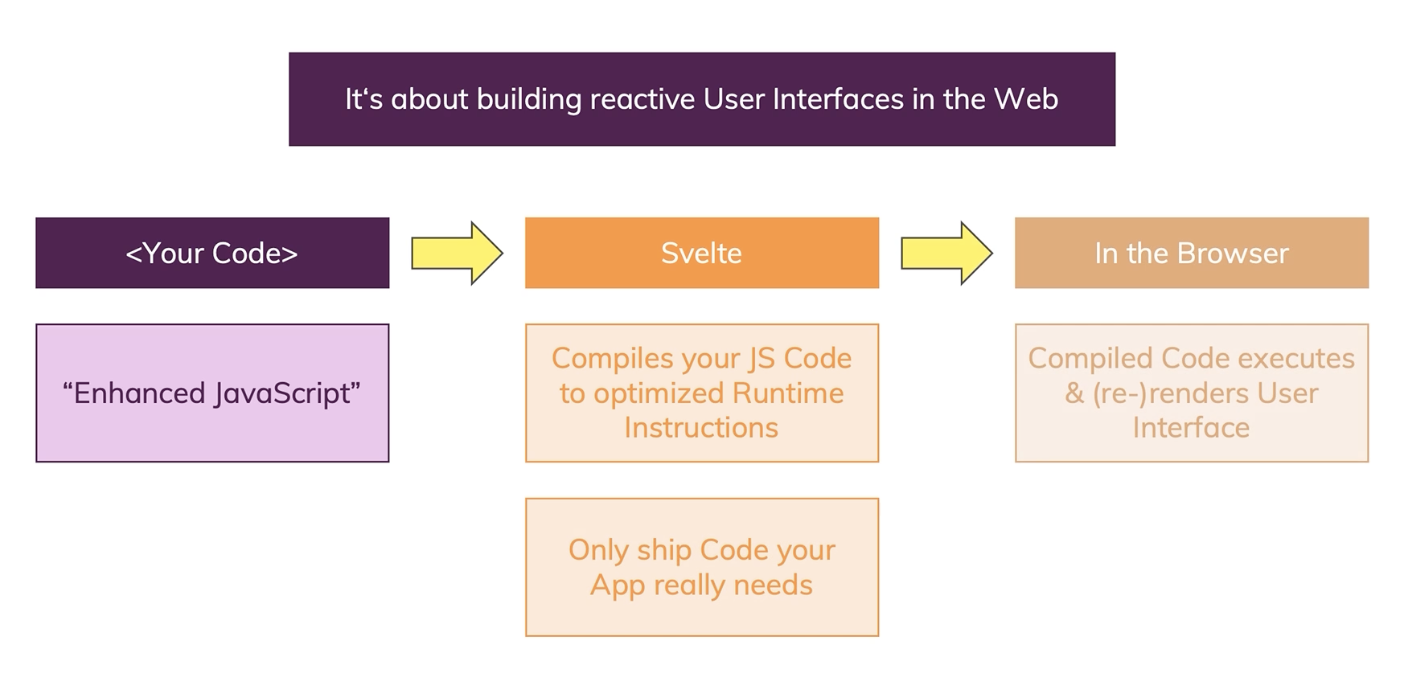
Vue and React and frameworks, Svelte is a compiler - Svelte compiles the code written in Svelte syntax, transforms it into compact vanilla JS, and ships that to the user, instead of shipping the code and the framework like with Vue/React.
Svelte translates instructions into efficient runtime code at build time.
How does Svelte work?
Section 2: Base syntax & Core features
Reactive variables
As typically in JS, nobody uses the "$:" (like also "break") - a labeled statement, that are used in conjunction with loops and such. And because it's practically never used, Svelte takes advantage of this fact and hijacks the "$:".
It's used for dynamic calculations, where you want these calculations to be executed whenever some variable somewhere in the code changes, and re-do the calculation.
$: uppercaseName = name.toUpperCase()
$: console.log(name)
$: if (name=="Kenneth") {age=0}
Components & Communication via Props
To allow for a variable of a component to be set by a parent component, inside the component's svelte file, e.g. ContactCard.svelte, export the variables.
<script>
  export let userName
  export let userJobTitle
  export let userDescription
  export let userImage
</script>
Importing the child component in the parent component works as such:
<script>
  import ContactCard from './ContactCard.svelte'
</script>
In the parent component, the child component together with its props is used like this:
<ContactCard
             userName={name}
             userJobTitle={jobTitle}
             userDescription={description}
             {userImage} // if the prop name and the variable name in the parent component have the same name, you can use this abbreviated syntax
             />
Two-way binding shortcut
Instead of having to write a typical input field event listener function with cumbersome markup line like this:
<input type="text" value={name} on:input={nameInput}/>
And the "nameInput" function like this:
function nameInput(e) {
  const enteredValue = e.target.value
  name = enteredValue
}
It's possible in Svelte to use "bind:" syntax to create a bi-directional info flow in a much more concise way, without needing a separate event listener function:
<input type="text" bind:value={name}/>
Dynamic CSS classes
Add a conditional css class based on whether userImage contains an address or not. If not, the "thumb-placeholder" is displayed instead.
<div class="thumb" class:thumb-placeholder={!userImage}>
Assignment
Tasks
Add an input field that allows users to enter a course goal.
Output the user input in a h1 tag.
Color the output red (e.g. by adding a class) if it contains at least one exclamation mark.
Put the h1 tag + output into a separate component to which you pass the user input.
Section 3: Working with Conditionals & Loops
Using "if", "else" & "else-if" statements in HTML
You can create conditional rendering in the html code by using this syntax:
{if formState=="invalid"}
    <p>Invalid input</p>
{:else if formState=='none'}
    <p>No contacts recorded, start adding contacts</p>
{:else}
    <p>Please start adding contacts!</p>
Outputting lists with "each"
Similar to the if, else, else-if conditional html rendering, it's possible to iterate through lists using each syntax to render html content:
{each createdContacts as contact, i (contact.id)}
  <h2># {i + 1}</h2>
  <ContactCard
  userName={contact.name}
  jobTitle={contact.title}
  description={contact.desc}}
  userImage={contact.image} />
{:else}
  <p>Please start adding contacts</p>
{/each}
Lists & keys
To improve performance when handling lists and removing elements, it's best to use unique identifiers for each entry in order not have svelte re-render all of the list items after the item in question. If the item has a unique identifier, only that item will be removed and no other items will be touched during re-rendering.
Assignment 2
Add a password input field and save the user input in a variable.
Output "too short" if the password is shorter than 5 characters and "too long" if it's longer than 10.
Output the password in a paragraph tag if it's between these boundaries.
Add a button and let the user add the passwords to an array.
Output the array values (=passwords) in an unordered list (ul tag).
Bonus: if a password is clicked, remove it from the list.
Code:
<script>
  let password = ''
  let passwordList = []

  function savePassword() {
    passwordList = [...passwordList, {
      id: Math.random(),
      password
    }]
    console.log(JSON.stringify(passwordList));
  }

  function deletePassword(id) {
    passwordList = passwordList.filter(passObj => passObj.id != id)
  }

</script>

<div>
  <input type='text' bind:value={password}/>
  <button on:click={savePassword}>Save password</button>
  {if password.length<5}
  <p>Password too short!</p>
  {:else if password.length>10}
  <p>Password too long!</p>
  {:else}
  <p>Password: {password}</p>
  {/if}
</div>
<div>
  <ul>
    {each passwordList as psw, i (psw.id)}
    <li on:click={()=>{deletePassword(psw.id)}}>{psw.password}</li>
    {/each}
  </ul>
</div>
Section 4: A closer look at Reactivity
Event modifiers
Possible to add a very short and convenient event modifier syntax, like this:
<button on:click|preventDefault={savePassword}>Submit password</button>
This on:click|preventDefault would prevent an automatic page reloading after clicking a button inside a form, for example. Normally this preventDefault would have to be performed in a separate manual function in the code:
function savePassword(e) {
  e.preventDefault()
}
Or, for example, can use once modifier to make the button clickable only once:
<button on:click|once={savePassword}>Submit password</button>
Section 6: Diving deeper into Components
Event Forwarding
If you omit writing an event handler for an on:click etc.m then you can forward the event to the parent component.
Instead of the on:click being handled in the Product.svelte component, it gets forwarded to the App.svelte component.
In Product.svelte
<button on:click > Add to Cart </button>
In the App.svelte
<Product on:click={() => alert('Clicked')}
However, if the on:click in the Product.svelte is omitted, then the even will not be forwarded.
Custom Events
If you have multiple buttons, then forwarding events to the parent component will not work that great, because then it'll be difficult to distinguish between which of the buttons was clicked when trying to resolve the on:click events. It would be possible to do that by dissecting the event.target object, but it's not really an elegant solution.
Instead, it's possible to create custom events by leveraging the createEventDispatcher feature of Svelte.
<script>
  import {createEventDispatcher} from 'svelte'
  const dispatch = createEventDispatcher()
</script>
dispatch takes in two arguments: 1) the custom function name, and 2) any data to be passed onto the function.
dispatch and its custom function can be called both inline, as well as separately in the